Renovation project - How to build a utility room
We have done another big shop and hopefully have all the supplies we
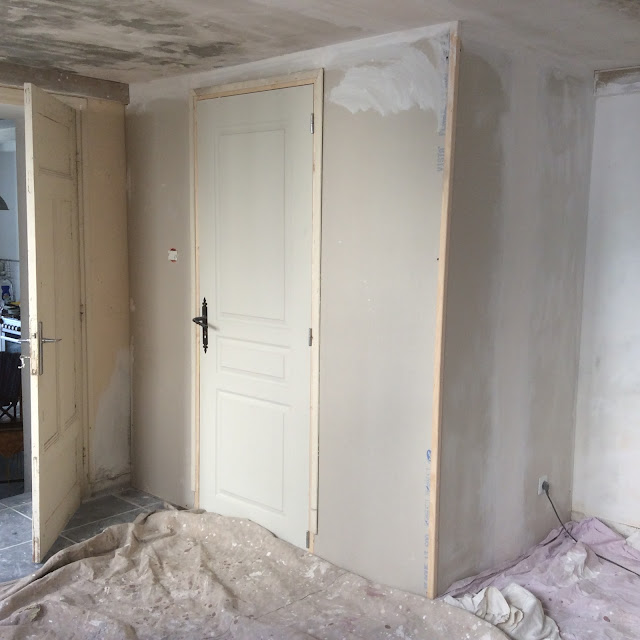
need to finish; we have the wooden batons to make the utility room, which goes
up in no time, we had already bought the door.
The studding goes up (wooden frame), we had worried if this would take too
much from the room, but it is surprising how big this room actually is.
The utility will be such a bonus as this will hide the electric meters,
the hot water tank and the washing machine, there will also be enough room for
a dryer.When measuring the dimensions, be sure to allow enough room to work on
all the equipment in the room, for example if you need to get too the hot water
tank or fix the washer, or require workable access to the consumer unit
That night as I do my washing, I close the door behind me, why I do this
I have no idea as there aren’t actually any walls there yet!
The plaster board goes up and the joints are filled and sanded. As the walls have not been fully skimmed with plaster, just the joints, John was not able to use the metal bead for the corners, instead he has added a wooden corner trim. (which seems to be the norm in France)
This room is
finished in no time, it just needs a coat of paint


Presto-change-o! Great job. I can't ever understand why so many French apartments and homes leave the hot water tank hanging out on display, rather than enclose it. I actually thought there might be some regulation that required they not be enclosed!
ReplyDeleteha ha I think it is just easier to install them over the sink, it looks so much better in a utility out of the way
DeleteProgress feels so fulfilling, doesn't it? Looks terrific. Maybe you closed the door so you could have extra room.
ReplyDeletethank you, I think it is just force of habit from when the house was so cold, every door had to be kept shut
DeleteNice! I absolutely love my laundry room. I noticed the hot water tank is hanging on the wall ?. Is that a normal thing where you are? Ours sits on the floor with the connections on the top. But of course the drains, heating elements and overflow are on the bottom. I love reading about your reno's. Hope you are feeling better today. Nothing like the Men-O-Pause ;) to make a woman wish she was a man until it's over. haha!
ReplyDeletehere they are all on the wall. Not sure I would like to be Jon at the moment, as I think he maybe suffering just as much with my mood swings and lack of sleep ;)
DeleteMatter of size mainly - tanks up to 120 l are often wall-mounted while larger ones usually sit on the floor. Fixing them to the wall more or less gets them out of the way, some can even be installed sideways below the ceiling. Don't forget that central heating and hot water arrived fairly late in continental Europe, somewhat spartan houses were built with cast-iron stoves and a coal or oil-fired hot-water tank in the bathroom well into the early 1960s!
ReplyDeleteIn the days of cheap electricity and in places without city gas these huge tanks were often replaced with electric heaters and the obious place for them was where the pipes were and where the hot water was needed, i.e. in the kitchen or bathroom.
BTW, I'm not sure how skim-coating and corner beading are related, it's used here in Austria all the time and no one skims plasterboard ("Why'd you do that? It's already a finished wall surface!"). I hate it because it has such sharp edges but that's about it. Painting it is a bear too because the metal edge remains exposed and the paint needs to stick to the metal.